Page 2 of 5 FirstFirst 1234 ... LastLast
Results 11 to 20 of 41

Thread: phase 4 of shop mods... probably the last :)

  1. #11
    Join Date
    Apr 2013
    Location
    Kennebunkport, Maine
    Posts
    4,420

    Default

    Thanks Andrew
    Bet you had/will have fun too.
    Good selection of tools(as long as you keep your chisel planes/japanese saws hidden
    VERY nice for you to do, and probably a lasting impression on the kids and parents.
    Me, I'd have a meltdown the day before trying to find everywhere I'd used my "Sharps" (not as organized as you and they don't always wind up on/in their roll/shelf/box)
    scott P.
    2013 Desktop/spindle/VCP 11.5**
    Maine

  2. #12
    Join Date
    Jul 2011
    Location
    Timmins, Ontario, Canada
    Posts
    1,825

    Default

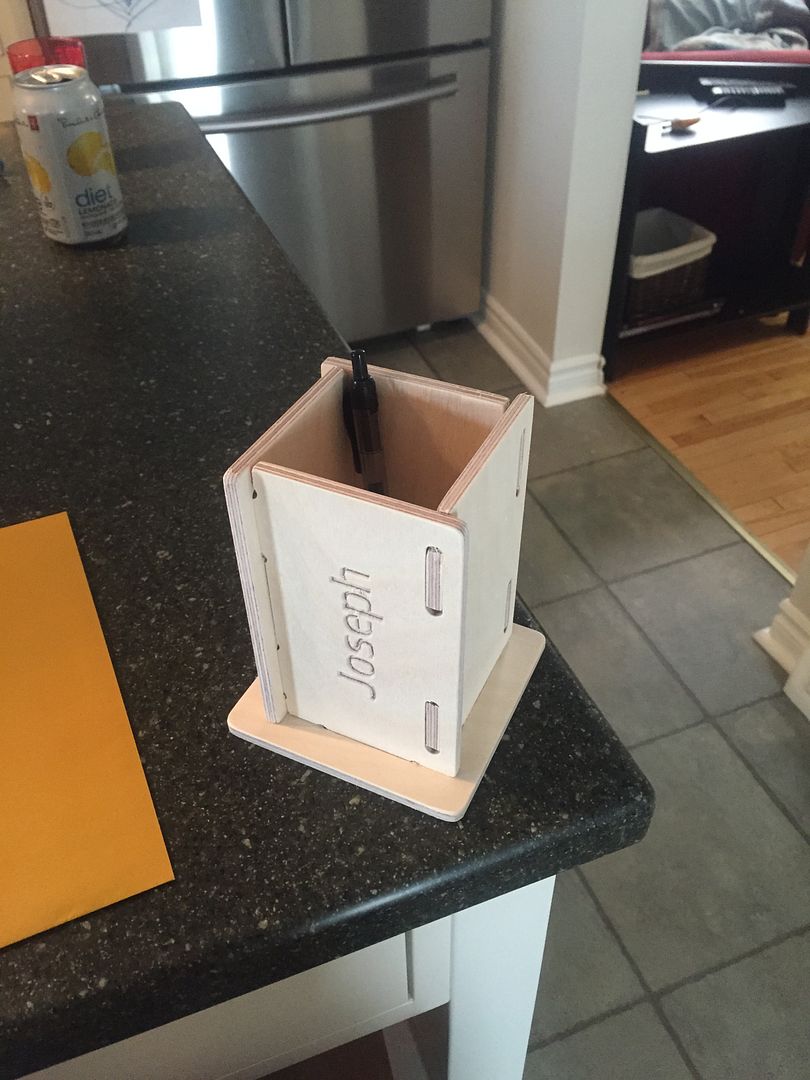
    Well, we do use both a Western style dovetail saw, and a Japanese pull saw (dozuki) and also I set up my old mitre box with the large Disston back saw. We dont use chisels, but several smaller hand planes so they can try and take a shaving from some pine or basswood. We also use a fret saw with some thin dressed basswood. And of course both the eggbeater and brace to show how holes used to be drilled.

    Then I have then sand and assemble their boxes. They go together easily but they are super happy to take something home, that "they" made and has their names V carved on it too.

    All machinery gets turned off, all work in progress pushed out of the way. The staff makes sure they know not to touch anything and they never have. The daycares I deal with are very well run, and well staffed. About 5 staff comes along, and there are three of us and one more as one of my retired friends comes to help also.

    That will tie up my morning - and hopefully in the afternoon I will get the ceiling done. I just went out to buy 6pcs 48" dual T8 fixtures, and more silicone and foam. Im headed to the shop now to tidy up and get things set up!

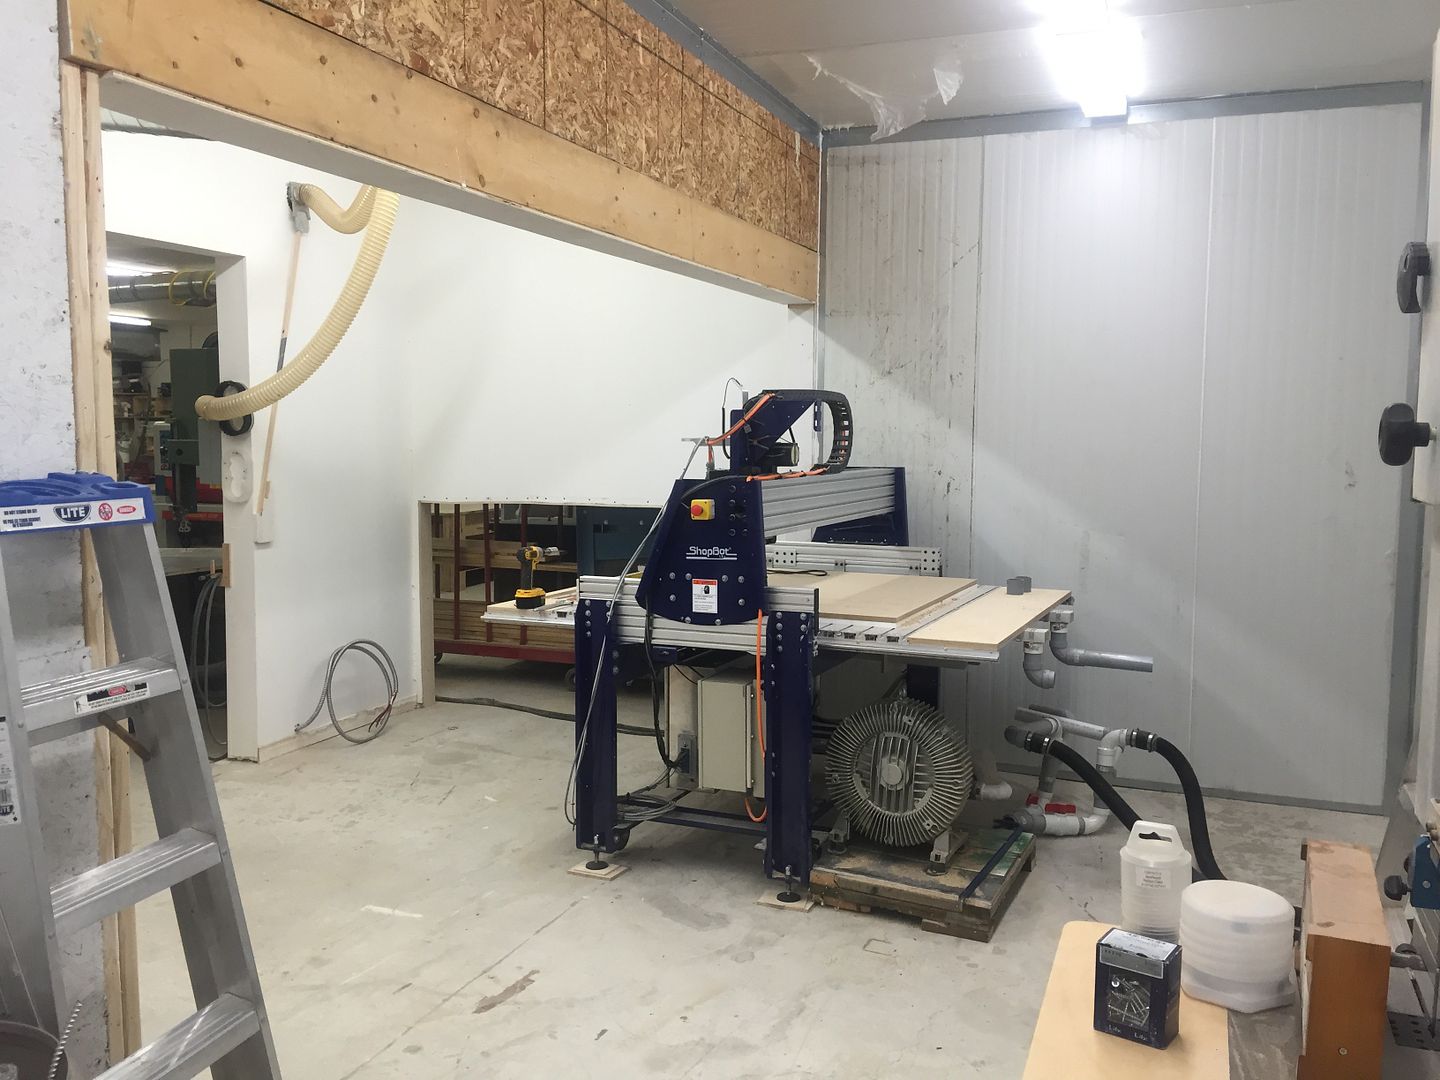
    I am expecting the Maggi to arrive next week. I want to have my Shopbot in place, the sanders moved and everything wired in (just need to move a bit of wire and extend a few things) and get the dust collector piping up.

  3. #13
    Join Date
    Jul 2011
    Location
    Timmins, Ontario, Canada
    Posts
    1,825

    Default

    I spent the afternoon cleaning the shop, tidying up and getting things ready for Monday morning...

    This is the project:


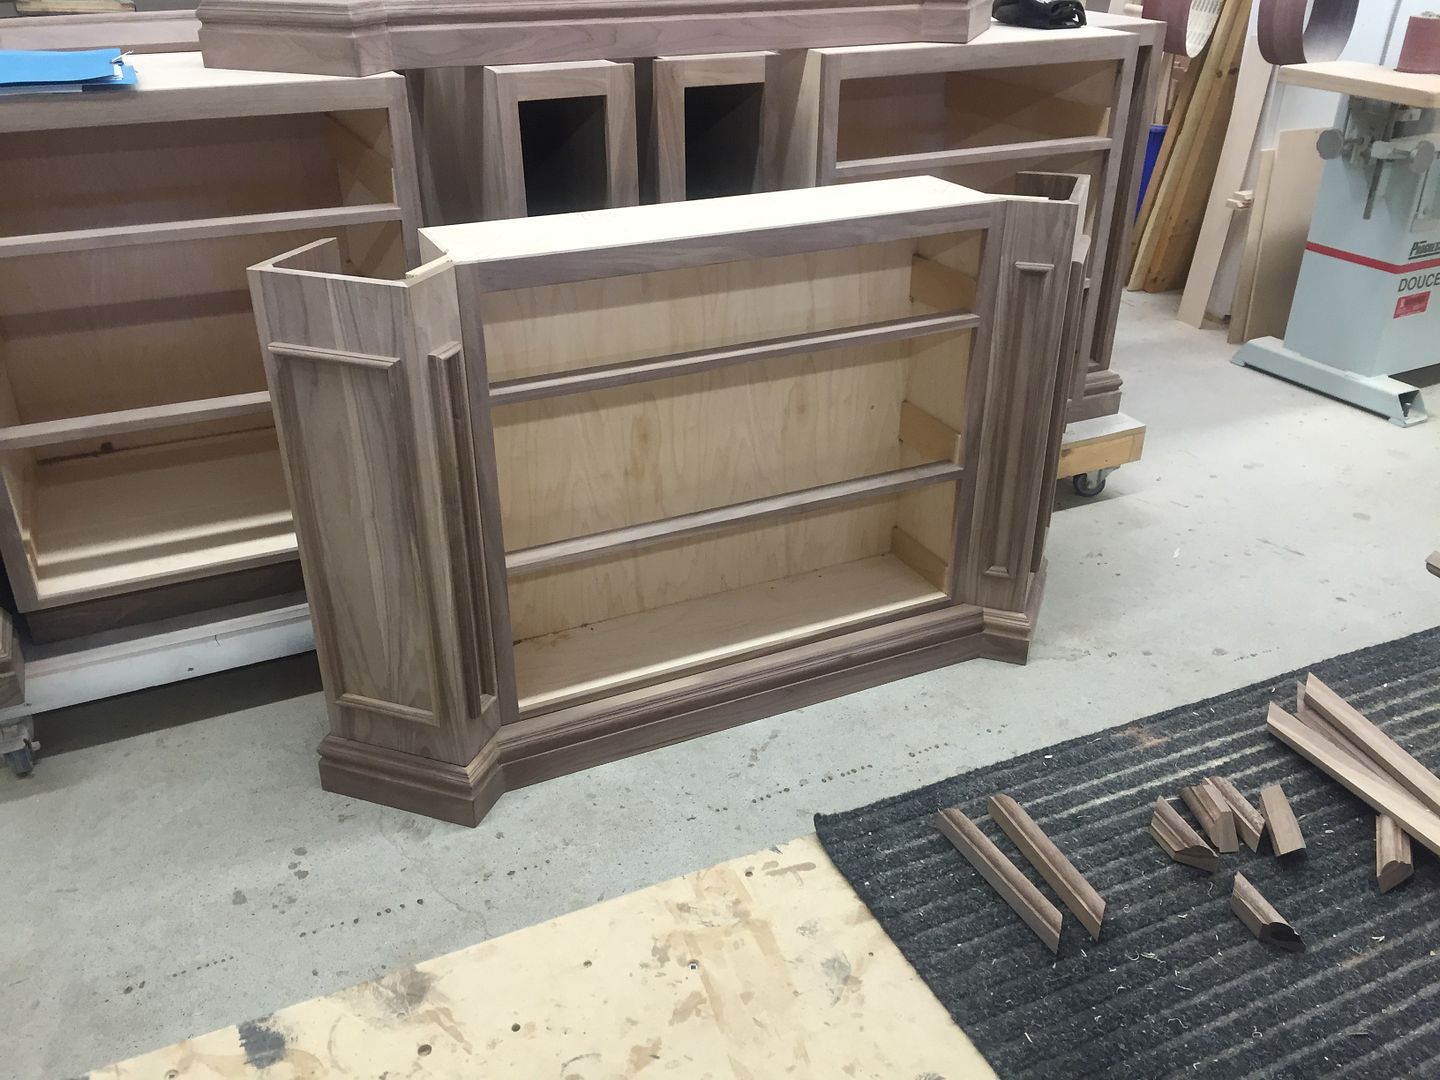
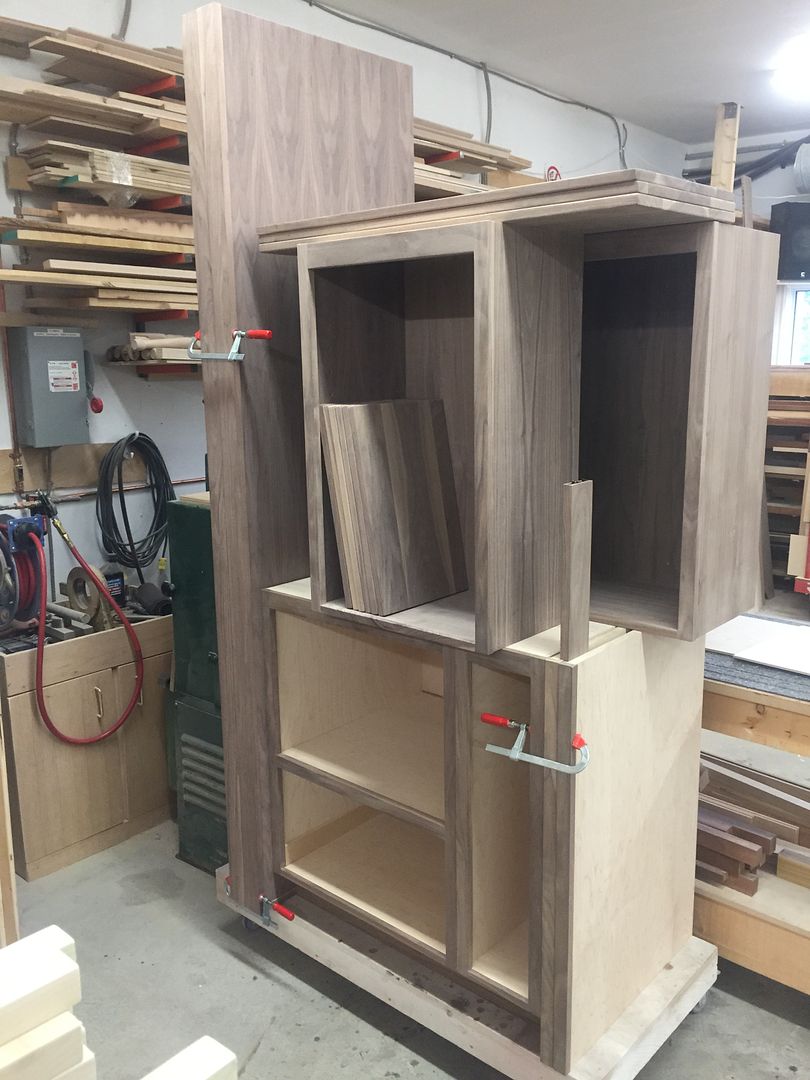
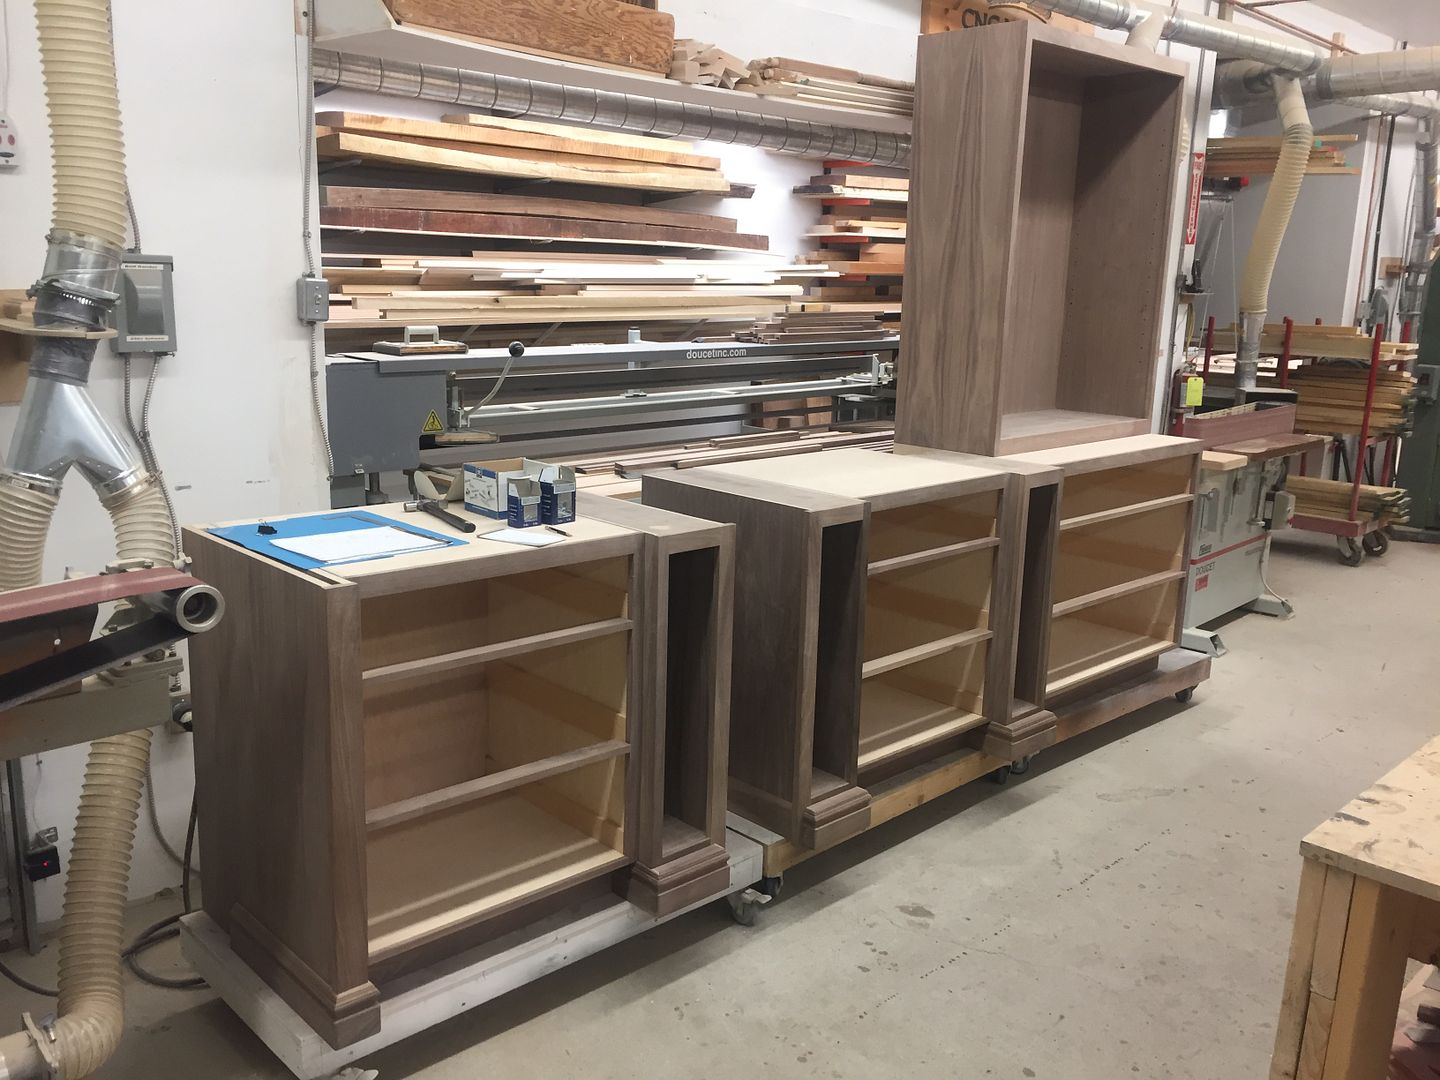
    And this is the kitchen Im working on. Lots of trim left and then doors and fronts, and drawers and trays left.


  4. #14
    Join Date
    Sep 2008
    Location
    San Jose del Cabo based since 1997
    Posts
    1,244

    Default

    photo 2 of kitchen...are those solid wood glue ups for shelving or veneers with banding? right side of box shows 3 face frame stiles clamped...is this per design? also in drawer bxs I see shims for clearance of guides ?...is this to pass doors that open? we use blocks instead of full length spacing in the rare case box sides are not flat. on that note we have moved to the Hafele Moovit system...
    Attached Images Attached Images
    Vector Studio 22

  5. #15
    Join Date
    Jul 2011
    Location
    Timmins, Ontario, Canada
    Posts
    1,825

    Default

    Quote Originally Posted by gc3 View Post
    photo 2 of kitchen...are those solid wood glue ups for shelving or veneers with banding? right side of box shows 3 face frame stiles clamped...is this per design? also in drawer bxs I see shims for clearance of guides ?...is this to pass doors that open? we use blocks instead of full length spacing in the rare case box sides are not flat. on that note we have moved to the Hafele Moovit system...
    In the kitchen there is a 48" by 84" sub zero fridge, and the two 2 1/1" wide gables go around that (along with a 3" top frame piece). The smaller gables are for a second wine fridge, which goes against a wall, and will have two 1 1/4" gables on either side with the decorative base trim. The visible sides of the gables get the molding same as the island end units (with the boxed sections). Everything is just clamped together for convenience in the shop until I work on that section.

    There are minimal uppers - just a single 40" hutch cabinet, which will have glass doors, and three 20" uppers which will have wood doors. I did make the shelving from solid walnut.

    I use Blum Movento undermount slides. The drawers will be dovetailed wood boxes as usual. The cabinet boxes are perfectly square/parallel and will stay that way since I use particle core veneer and store it flat as it comes off the truck. Never had an issue with warping, except with veneer core ply. I have always favoured full length build outs VS blocks (my father used blocks) as I like the look better, and it is faster for me to install VS several blocks per slide. The Movento slides are very nice, and offer a ton of adjustment. I know every company has their own similar product but I have gone to pretty much Blum and accuride products (although I still have an active account and deal with Hettich and Hafele as well).

    Most of the lowers are drawers. But there are some trays, and with the Blum hinges I use, I use a 1" build out to clear the hinges for those.

    The island end cabinets are just 9" deep, so I will be using Accuride full extension side mounts on those drawers. The Island is 110" by 70" - and has 7 cabinets and a space for the dishwasher as well.

    Finish will be a coat of clear danish oil, and then post cat lacquer. The customer wants the varying shades in the walnut, so no colour/shading will be done.

  6. #16
    Join Date
    Apr 2013
    Location
    Kennebunkport, Maine
    Posts
    4,420

    Default

    Ah...Pencil Box
    Wish MY SubZero panel had grain like that instead of plain vanilla Cherry(matches cabinets better, but still...that face is almost a different view point of kitchen).
    NICE veneer! Claro?
    That's going to be one Beautiful Kitchen Andrew!
    Make sure and show Oiled and Popped!!
    scott P.
    2013 Desktop/spindle/VCP 11.5**
    Maine

  7. #17
    Join Date
    Jul 2011
    Location
    Timmins, Ontario, Canada
    Posts
    1,825

    Default

    Quote Originally Posted by scottp55 View Post
    Ah...Pencil Box
    Wish MY SubZero panel had grain like that instead of plain vanilla Cherry(matches cabinets better, but still...that face is almost a different view point of kitchen).
    NICE veneer! Claro?
    That's going to be one Beautiful Kitchen Andrew!
    Make sure and show Oiled and Popped!!
    Its just stock (pressed up here in Canada, on Canadian core) flat sawn American black walnut. Its nice stuff though. I love walnut.. and love working with it as well. Its a great job, great customers to deal with as well. They know what they want and I am trying to give them exactly what they want.

    I actually designed and had the carbide cutters for the doors, and base, trim etc ground just for this job. A few hundred bucks per set of knives on a job of this size is no issue for me, and I can give them a real custom job. I have a nice Royce/Ayr head that takes up to 60mm high knives. Nice to have for the shaper.

    Dont worry I will take some pics of it finished.

    It is supposed to be installed in mid Sept. The house is under construction, it is a new post and beam home being built on a lake about 45 min out of town. Really nice home. They are a bit behind, so I am working on a few other jobs at the same time. Otherwise I'd be done this month.

  8. #18
    Join Date
    Jul 2011
    Location
    Timmins, Ontario, Canada
    Posts
    1,825

    Default

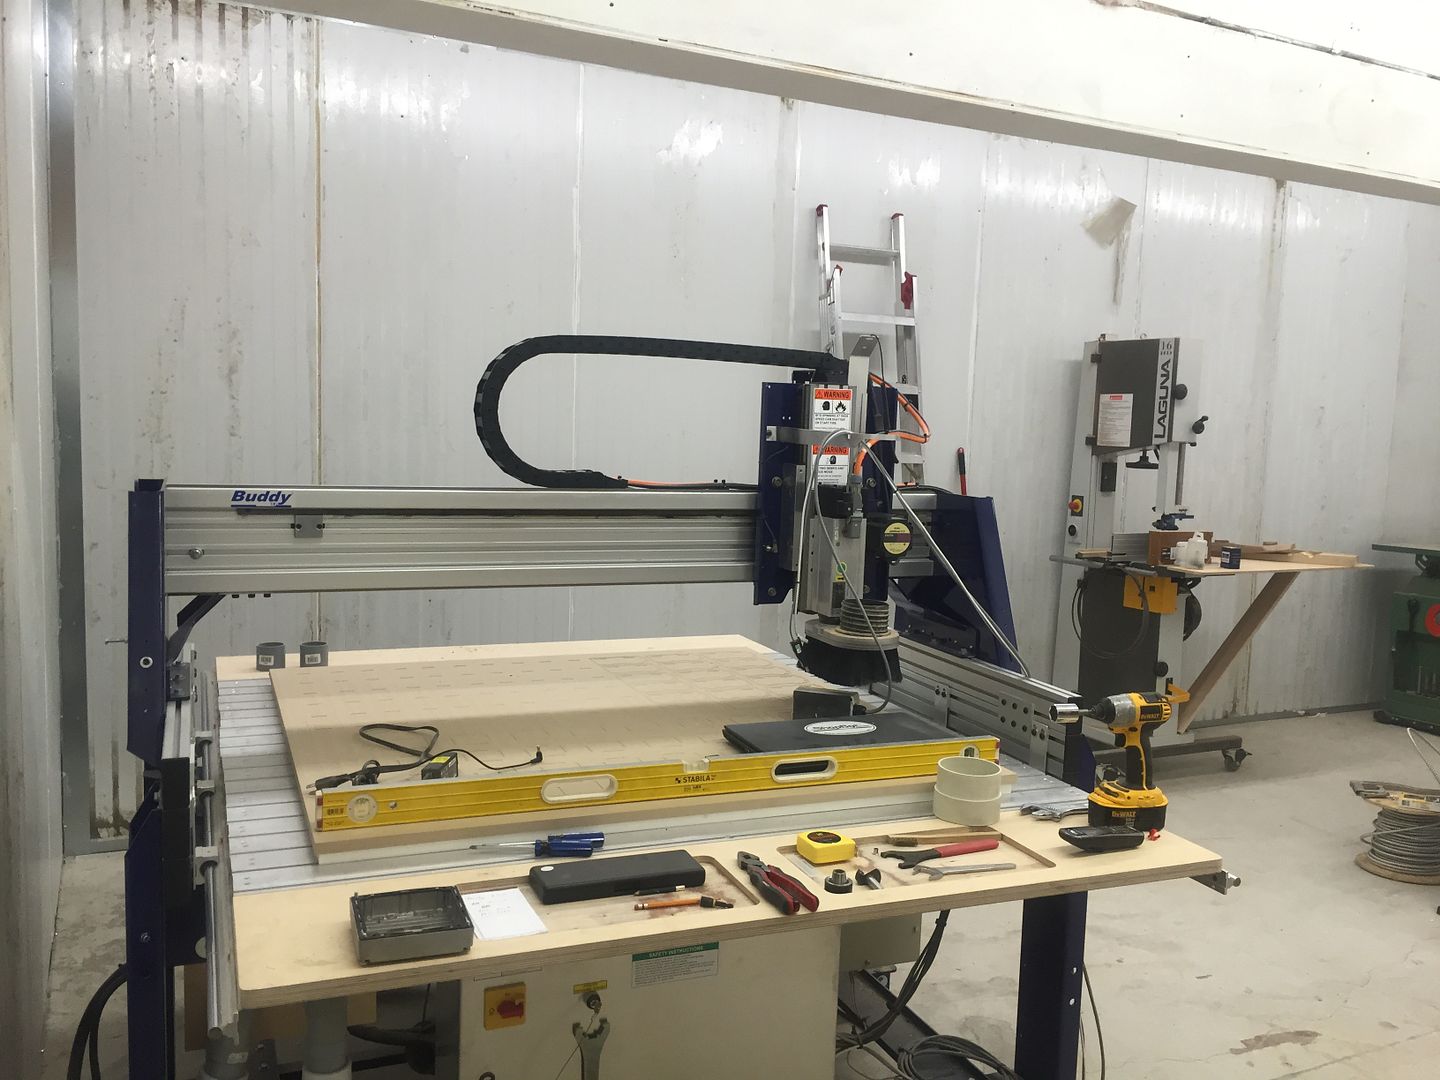
    Got the ceiling done this afternoon and the light fixtures up and wired up. I also moved my buddy 90 degrees and down towards the new exterior wall. I will have a lot more free space off either end, and to the side than I did when it was wedged into the 8' space. I just need to move the vac pump into final position, re-hook it up and run a new length of cable from the disconnect to the motor. I had enough slack in the Shopbot cable to put it where I wanted it. DC will be a simple matter of extending the piping 7 or 8 feet.

    Should be able to finish moving the equipment and clean up the wiring tomorrow. Then its back to work! Not bad, this whole modification of the shop will only have taken between 2 and 3 days total. I have work to be done on the CNC so I have to get it hooked up and running tomorrow.


  9. #19
    Join Date
    Jul 2011
    Location
    Timmins, Ontario, Canada
    Posts
    1,825

    Default

    Almost forgot.. the morning went great! Had two super well behaved groups of kids - who enjoyed all the sawing, drilling and hand planing. They really enjoy themselves and not one kid did anything they werent supposed to.

    I told a few of them to come back in 15 years for a job... lol.

  10. #20
    Join Date
    Feb 2011
    Location
    Melbourne, Australia
    Posts
    545

    Default

    Hey Andrew....now I can see and appreciate your Regan blower......it's a monster!!! No wonder your getting such tremendous suction.......

    Looking good......cheers
    Buddy 48 Standard with 2.2 Hp Spindle with standard and 6' stick. Aspire 10.5
    2.2Hp universal 4 zone Vac Table

Similar Threads

  1. Control Box mods
    By fsrdoug in forum Variations & Modifications of ShopBots
    Replies: 4
    Last Post: 08-24-2011, 01:57 AM
  2. single phase to 3 phase
    By cedarsawdust in forum Assembly & Maintenance
    Replies: 17
    Last Post: 02-12-2011, 09:55 AM
  3. Have Single Phase spindle but 3 phase power
    By david_gregas in forum Assembly & Maintenance
    Replies: 13
    Last Post: 01-02-2009, 06:40 PM
  4. PRS Mods
    By srwtlc in forum Archives2007
    Replies: 1
    Last Post: 08-09-2007, 02:07 AM
  5. 1 phase to 3 phase power converter
    By expresssigns in forum Archives2004
    Replies: 5
    Last Post: 08-20-2004, 03:04 PM

Posting Permissions

  • You may not post new threads
  • You may not post replies
  • You may not post attachments
  • You may not edit your posts
  •